
Performing a basic VLF (Very Low Frequency) hipot test procedure is crucial for assessing the insulation integrity of electrical cables and equipment. As a VLF hipot tester supplier, I understand the significance of this test and the importance of conducting it correctly. In this blog post, I will guide you through the essential steps of a basic VLF hipot test procedure.
Step 1: Preparation
Before starting the VLF hipot test, it is essential to make thorough preparations. First, ensure that the test area is safe and free from any potential hazards. All personnel involved in the test should be wearing appropriate personal protective equipment (PPE), such as safety glasses, gloves, and insulated footwear.
Next, gather all the necessary equipment for the test. This includes the VLF hipot tester, test leads, and any other accessories required for the specific test. Make sure that the VLF hipot tester is in good working condition and has been calibrated according to the manufacturer's recommendations.
Inspect the cable or equipment to be tested for any visible damage or defects. If any issues are found, they should be addressed before proceeding with the test. Additionally, ensure that the cable or equipment is properly grounded to prevent electrical shock.
Step 2: Connect the Test Equipment
Once the preparations are complete, it's time to connect the test equipment. Start by connecting the test leads from the VLF hipot tester to the cable or equipment being tested. Make sure that the connections are secure and free from any loose wires or connections.
The VLF hipot tester typically has two output terminals: a high-voltage terminal and a ground terminal. Connect the high-voltage terminal to the conductor of the cable or equipment being tested, and connect the ground terminal to the ground. It is important to follow the manufacturer's instructions for proper connection to ensure accurate test results.
Step 3: Set the Test Parameters
After connecting the test equipment, you need to set the test parameters on the VLF hipot tester. The test parameters typically include the test voltage, test time, and frequency. The test voltage should be selected based on the type and rating of the cable or equipment being tested. It is important to follow the relevant standards and guidelines for selecting the appropriate test voltage.
The test time is the duration for which the test voltage will be applied to the cable or equipment. The test time is typically specified in minutes and should be selected based on the type and condition of the cable or equipment being tested.
The frequency of the VLF hipot test is typically set at 0.1 Hz. This frequency is used because it has been found to be effective in detecting insulation defects in cables and equipment. However, in some cases, other frequencies may be used depending on the specific requirements of the test.
Step 4: Perform the Test
Once the test parameters are set, you can start the VLF hipot test. Press the start button on the VLF hipot tester to apply the test voltage to the cable or equipment being tested. During the test, monitor the test results on the VLF hipot tester's display.
The VLF hipot tester will typically display the test voltage, test current, and any other relevant test parameters. It is important to monitor the test current during the test to ensure that it remains within the acceptable range. If the test current exceeds the acceptable range, it may indicate a problem with the insulation of the cable or equipment being tested.
The test should be continued for the specified test time. At the end of the test, the VLF hipot tester will automatically stop applying the test voltage.
Step 5: Analyze the Test Results
After the test is complete, you need to analyze the test results to determine the condition of the insulation of the cable or equipment being tested. The VLF hipot tester will typically provide a pass or fail indication based on the test results.
If the test results indicate a pass, it means that the insulation of the cable or equipment being tested is in good condition. However, if the test results indicate a fail, it means that there may be a problem with the insulation of the cable or equipment being tested.
In the case of a failed test, further investigation may be required to determine the cause of the problem. This may involve performing additional tests or inspections on the cable or equipment being tested.


Step 6: Disconnect the Test Equipment
Once the test is complete and the test results have been analyzed, it's time to disconnect the test equipment. First, turn off the VLF hipot tester and allow it to discharge any remaining electrical energy.
Next, disconnect the test leads from the cable or equipment being tested. Make sure that the connections are removed carefully to avoid any electrical shock.
Finally, store the test equipment in a safe and dry place for future use.
Conclusion
Performing a basic VLF hipot test procedure is an important step in assessing the insulation integrity of electrical cables and equipment. By following the steps outlined in this blog post, you can ensure that the test is conducted safely and accurately.
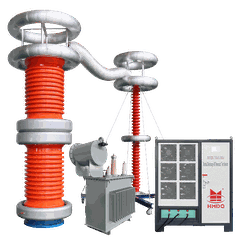
As a VLF hipot tester supplier, we offer a range of high-quality VLF hipot testers that are designed to meet the needs of various industries. Our VLF Hipot Tester with Tan Delta Measurement and 50kV VLF Hipot Tester are just some of the products we offer.
If you are interested in purchasing a VLF hipot tester or have any questions about our products or services, please feel free to contact us. We would be happy to assist you with your testing needs.
References
- IEEE Standard for Field Testing Insulated Power Cables with DC and Very Low Frequency (VLF)
- IEC Standard for Testing of Insulated Cables and Wires at Very Low Frequencies