

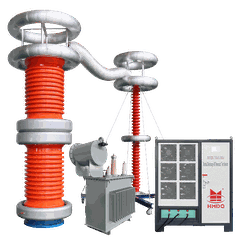




Wuhan Goldhome Hipot Electrical Co., Ltd. is one of the leading manufacturers and suppliers of dielectric strength tester for insulating oil in China. With abundant experience, our factory offer high quality customized products made in China with competitive price. Welcome to contact us for quotation.
Products Video
HMDQ HM801 BDV Parameter Setting Test Video
Products Overview

The Goldhome HM803 Insulating Oil Dielectric Strength Tester (also known as the Three-Cup Insulating Oil Withstand Voltage Tester) is a high-precision, fully digital industrial-grade testing instrument meticulously developed by Wuhan Goldhome Hipot Electrical Co., Ltd. Drawing on years of industry experience and in strict accordance with national standard GB507-86, industry standard DL-474·4-92, DL/T596-1996, and is primarily used to determine the dielectric strength of insulating oil, accurately assess its insulating properties, and provide reliable assurance for the safe operation of power equipment. It is widely applicable in the power, petroleum, chemical, coal, and railway industries, and is suitable for testing the dielectric strength of various types of insulating oil, including transformer insulating oil, oil for high-voltage switchgear, insulating oil for capacitors, and cable oil. It enables quality inspection of new and regenerated oil prior to storage or commissioning, as well as periodic testing of oil in service to determine whether it has absorbed moisture, contains impurities, or has aged and degraded. By providing a scientific basis for preventive maintenance of equipment, it stands as one of the core pieces of equipment for power oil quality inspection.
Products Parameter
|
|

|
No |
Item |
Data |
|
1 |
Output voltage |
0~100KV (optional) |
|
2 |
Voltage distortion rate |
<1% |
|
3 |
Booster capacity |
1.5KVA |
|
4 |
Measuring accuracy |
±2% |
|
5 |
Supply voltage |
AC220V±10% 50Hz±1 Hz |
|
6 |
Power |
<200W |
|
7 |
Applicable temperature |
0℃~40℃ |
|
8 |
Applicable humidity |
<85%RH |
| 9 | Weight |
42 kg |
| 10 | Dimension |
650mm×470 mm×410 mm |
| 11 | Rise Rate |
0.5 kV/s–5.0 kV/s (in 0.5 kV/s increments); 10 selectable levels Accuracy 0.2 kV/s |
| 12 | Number of Tests | 6 (selectable from 1 to 9) |
|
13 |
Static holding time | 900 s (selectable from 0–9999 s) |
| 14 | Interval static holding time | 300 s (selectable from 0–999 s) |
| 15 | Stirring time | 15 s (selectable from 0–255 s) |
Products Details


1. LCD Screen Displays relevant information such as date, time, operating parameters,
test results, and menu prompts;
2. Function Keys Select and set operating parameters;
3. Printer Prints test results;
4. Indicator Lights Lights indicate that the corresponding operation is in progress;
5. Oil Cup Compartment Lid Open to insert or remove the oil cup;
testing can only proceed after closing the lid;
6. Temperature and Humidity Sensor Measures temperature in degrees Celsius and relative humidity
converting them into digital signals for display;
7. Ground Terminal Reliable ground connection terminal;
8. Power Socket Securely connects to a 220V AC, 50Hz power cord;
9. Power Switch Controls the instrument's power on/off;
Precautions
1. Be sure to read this operating manual thoroughly before using this instrument;
2. The operator should be familiar with the general principles of operating electrical equipment or analytical instruments;
3. This instrument can be used both indoors and outdoors, but should be kept away from rain, corrosive gases, high concentrations of dust, high temperatures, or direct sunlight;
4. Keep the oil cup clean. When the instrument is not in use, fill it with a sufficient amount of qualified, dried insulating oil to prevent moisture absorption and electrode oxidation;
5. After one month of continuous use, perform routine inspection and maintenance. Check and adjust the electrode gap to restore it to the standard value; use a magnifying glass to inspect the electrode surface for dark spots. If any are found, wipe the surface with a silk cloth to restore it to its original condition;
6. Instrument repair and calibration must be performed by qualified personnel;
7. Before connecting to the power supply, carefully check that all connection cables are secure, and ensure the instrument housing is properly grounded!
8. After connecting to the power supply, operators are strictly prohibited from touching the outer casing of the oil cup box to avoid the risk of electric shock!
9. If any abnormalities are detected during operation, immediately disconnect the power supply!
10. Do not allow the screen to come into contact with oil or other liquids, as this may cause the screen to malfunction.
Troubleshooting
| No response upon startup | Check that the power cord is securely plugged in and that the fuse is intact; |
| Voltage does not rise | Check that the oil cup lid is securely closed; |
| Voltage rises normally but no breakdown | Check whether the settings limit the stop-rise voltage; |
| No display after breakdown | Check for debris inside the oil reservoir; |
| Paper does not feed: | Check if there is paper in the printer; |
| Replacing the printer paper | The printer comes with paper pre-installed. If the paper runs out, you will need to install new paper yourself. To install, open the printer's paper tray, insert the paper, and let a portion extend out. Ensure the glossy side of the paper faces the thermal printer's serrated edge. |
Hot Tags: dielectric strength tester for insulating oil, China dielectric strength tester for insulating oil manufacturers, factory


