

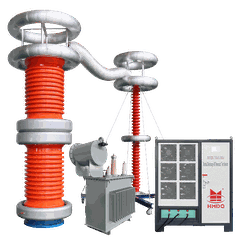


Acoustic-Magnetic Cable Fault Locator User Guide
The Acoustic-Magnetic Cable Fault Locator is a core piece of equipment for power cable operation and maintenance. Based on the principle of acoustic-magnetic synchronous detection, it applies high-voltage pulses to the faulty cable, inducing discharges at the fault point. Simultaneously, it detects both the mechanical vibration sound waves and electromagnetic pulse signals generated by the discharge. By calculating the time difference between these acoustic and magnetic signals, it precisely locates fault points such as ground faults, short circuits, and breaks in medium- and high-voltage cables. This addresses the industry challenges of low accuracy and slow efficiency in traditional location methods, where manual inspection is difficult and time-consuming. Failure to locate and repair faults promptly directly impacts power supply reliability. Widely deployed for fault detection in 10kV-220kV power cables including cross-linked polyethylene and oil-impregnated paper types, it serves as an indispensable tool for cable maintenance in power grids, municipal networks, and industrial/mining enterprises.

Fault Types
I. Signal-Related Faults
Symptoms: Absence of electromagnetic/acoustic signals, weak signals, or significant noise interference preventing fault location
Causes: Poor contact at sensor probe, insufficient discharge at fault point, nearby metal/electromagnetic interference sources, loose cable connections
Resolution: Ensure sensor is firmly pressed against cable/ground surface; clean probe contact area; reapply high-voltage pulse to ensure complete fault point discharge; relocate detection area away from transformers and metal conduits; inspect and tighten equipment cable connections.
Fault Symptom: Acoustic-magnetic signals out of sync, significant deviation in location readings
Causes: Incorrect equipment parameter settings; failed time difference calibration; sensor damage
Resolution: Restore factory settings and re-match cable model parameters; perform time difference calibration; test with spare sensor, repair promptly if damaged.
II. Operational / Display Faults
Fault Symptom: No display upon power-up, screen distortion or unresponsive buttons
Causes: Low battery charge, loose display cable, button ingress of dust/moisture
Resolution: Charge immediately and inspect charging port contact; After powering off, gently tap the device casing to reset the cable (professional operation required); clean button crevices with a dry cloth and blow-dry internal moisture.
Fault Symptom: Data storage/export failure
Causes: Poor memory card slot contact, full memory, USB drive/memory card incompatibility
Solution: Eject and clean the memory card slot; delete unnecessary historical data to free memory; replace with a compatible, genuine brand storage medium.
III. Hardware / Power Supply Faults
Fault Symptom: Device fails to power on, or shuts down automatically after startup
Causes: Battery degradation/damage, faulty power module, internal circuit short-circuit
Resolution: Test with a spare battery; replace degraded batteries promptly; inspect power module wiring to prevent short-circuits; non-professionals must not disassemble the unit – contact the manufacturer for internal circuit repairs.
Fault Symptom: High-voltage pulse output failure
Causes: Damaged high-voltage switch, poor discharge circuit contact, overvoltage protection tripped
Resolution: Switch off equipment and leave idle for 10 minutes to reset protection mechanism; inspect and secure discharge circuit wiring; upon confirming high-voltage switch damage, have components replaced by manufacturer's qualified personnel.
Core Operational Precautions
1.Prior to operation, ensure the cable is completely de-energised, tested for voltage absence, and earthed. Remove all loads to prevent high-voltage pulse electric shock or equipment damage. Operators must wear insulating protective equipment.
2.Before detection, use a cable fault tester to determine fault characteristics and perform coarse location to establish the approximate fault range. Subsequently employ an acoustic-magnetic locator for precise positioning to avoid indiscriminate testing.
3.During detection, ensure sensors are firmly pressed against the cable sheath or laid directly on the ground. Avoid interference sources such as metal pipes and reinforced concrete to minimise environmental attenuation of acoustic and electromagnetic signals, thereby enhancing positioning accuracy.
4.During high-voltage pulse application, personnel must not approach the cable or testing equipment. Sensor relocation and point verification should only occur after discharge completion to prevent secondary discharge risks.
After use, promptly switch off the power supply, clean the sensor probe, and store the instrument in a dry, well-ventilated environment. Avoid moisture exposure and impacts. Regularly calibrate the device to maintain detection accuracy.


