

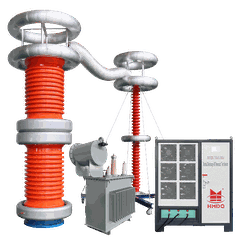


Field Use Guide for VLF and Comprehensive Diagnostic Testing of 33 kV Medium‑Voltage Cables
33 kV power cables (rated voltage U0/U typically 18/30 kV or 19/33 kV) serve as backbone lines in power grids and collection lines for renewable energy, making insulation integrity critical. During Very Low Frequency (VLF), Tan Delta (TD), and Partial Discharge (PD) testing, the test voltage can reach as high as 80 kV Peak (or 57 kV RMS), imposing stringent requirements on test safety and data accuracy. This guide covers safety protection, wiring procedures, voltage application steps, and finalisation details for on‑site testing of 33 kV cables.

1. Pre‑Test Preparation and On‑Site Safety Isolation
1.1 Double Disconnection and Thorough Voltage Verification
Both ends of the cable under test must be completely disconnected from switchgear, transformers, ring‑main units, or surge arresters, providing a clearly visible break point.
Use a high‑voltage tester suitable for the 33 kV level to verify phase‑by‑phase that no residual voltage remains on the cable.
1.2 Full Discharge and Space‑Charge Removal
Before and after testing, use a high‑voltage discharge rod with a current‑limiting resistor to fully discharge each phase conductor and the screen layer.
Due to the dielectric absorption effect of XLPE insulation, the grounding discharge time must be no less than 4 times the duration of the voltage application.
After discharging, install temporary grounding leads until the connections are removed.
1.3 Isolation at Both Ends and Remote‑End Protection
At the far (remote) end of the cable, assign a dedicated attendant or implement reliable security blocking. Set up warning tape and post "DANGER – HIGH VOLTAGE" signs to prevent unauthorised personnel from touching exposed cable terminations.
2. On‑Site Wiring and Equipment Layout Specifications
2.1 Grounding System Connection (Critical for Back‑Flash Protection)
Main grounding: The main ground terminal of the VLF generator must be connected directly to the substation or site main grounding grid using a thick copper conductor.
Screen grounding: The copper screen and steel armour of the cable must be reliably grounded. When testing a single phase, the non‑test phase conductors must be grounded together with the copper screen.
2.2 Signal Interference Suppression and Termination Treatment
Suspend the high‑voltage lead: Keep the high‑voltage output lead suspended, maintaining a sufficient clearance (≥ 50 cm) from surrounding grounded metal parts. Use anti‑corona spheres at wire joints to avoid air‑corona discharge interfering with PD acquisition.
Clean cable terminations: Before testing, thoroughly wipe the surface of the cable termination with anhydrous alcohol to remove oil and moisture, preventing surface leakage current from inflating Tan Delta measurements.
3. Voltage Application Procedure and Process Monitoring
3.1 Pre‑Test Insulation Check (Megger Threshold)
Before applying high voltage, measure the insulation resistance of the cable using a 5000 V megohmmeter.
If the insulation resistance R60s<100 MΩR60s<100 MΩ, it indicates severe moisture or damage – do not apply the high voltage; instead, investigate and rectify the fault first.
3.2 Stepwise Voltage Ramp and Parameter Setting
Target voltage:
For commissioning tests: 80.6 kV_peak (3.0U03.0U0);
For preventive maintenance tests: 59.4 kV_peak (2.2U02.2U0).
Stepwise ramp: Follow the sequence 0.5U0→1.0U0→1.5U0→0.5U0→1.0U0→1.5U0→ target voltage, increasing slowly and smoothly. Hold at each step for 1–3 minutes to obtain stable TD and PD data.
Load‑based frequency reduction: Verify whether the cable capacitance exceeds the equipment's load limit at 0.1 Hz (e.g., single‑core long cables >2 km>2 km). If an overload indication appears, reduce the output frequency to 0.05 Hz or 0.02 Hz as appropriate.
3.3 Emergency Response to Abnormalities
During voltage ramp‑up, if you observe violent fluctuations in leakage current, failure of voltage to rise, flashover, or a burnt odour, immediately reduce the voltage and cut off the high‑voltage supply.
4. Post‑Test Safety Finalisation
4.1 Voltage Reduction and System Discharge
At the end of the test, manually reduce the voltage to zero via the control panel before shutting down – never cut the main power while high voltage is still present.
After the internal discharge circuit brings the equipment residual voltage to zero, connect the high‑voltage discharge rod and ground each phase directly.
4.2 Re‑Measurement of Insulation Resistance
After completing the high‑voltage withstand test, re‑measure the insulation resistance using the 5000 V megohmmeter.
If the post‑test insulation resistance shows a significant drop (more than 30% compared to the pre‑test value), even if the withstand test did not trip, the insulation should be deemed degraded


